Event dedicated to SmartPlayer - a platform for implementing multimedia projects of any complexity and centralized device management. The advantages of the solution include: the ability to refine the software and develop new functionality to meet customer requirements, cross-platform compatibility, and local technical support.
Program: Problem statement: why is SmartPlayer needed? Licensing scheme; SmartPlayer use cases.
- Software demonstration.
Speakers:
- Timur Ashirov, Head of Presales;
- Artemy Karochkin, Business Development Director.
We will briefly talk about the platform, thoroughly analyze the technical aspects of its use, and discuss the functionality of the platform.
The Russian company Smart Player is a developer of a software and hardware platform for implementing multimedia projects of varying complexity. It was founded in Moscow in 2016.
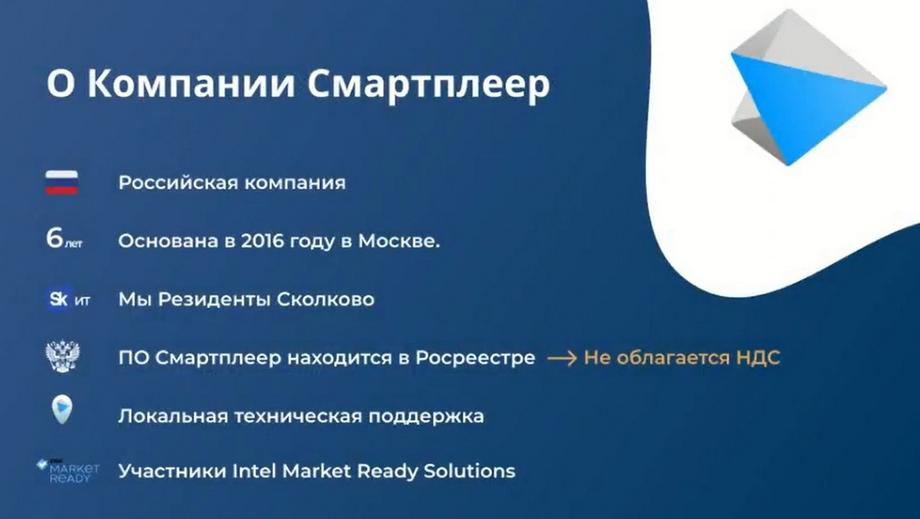
It is a resident of Skolkovo, is in the RosReestr, and is not subject to VAT. This is all in demand in the Russian market, considering the departure of some Western solutions and the orientation of government institutions towards switching to domestic software.
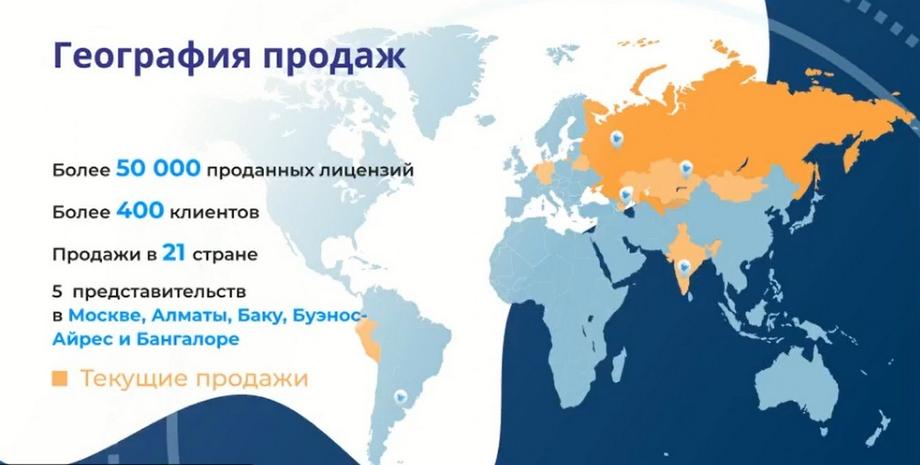
The geography of sales is very extensive, with several representative offices around the world. However, the main focus is on the Russian market and the CIS countries. Over the year of our activity, we have successfully sold more than 50 thousand licenses and implemented more than 400 projects in various fields.
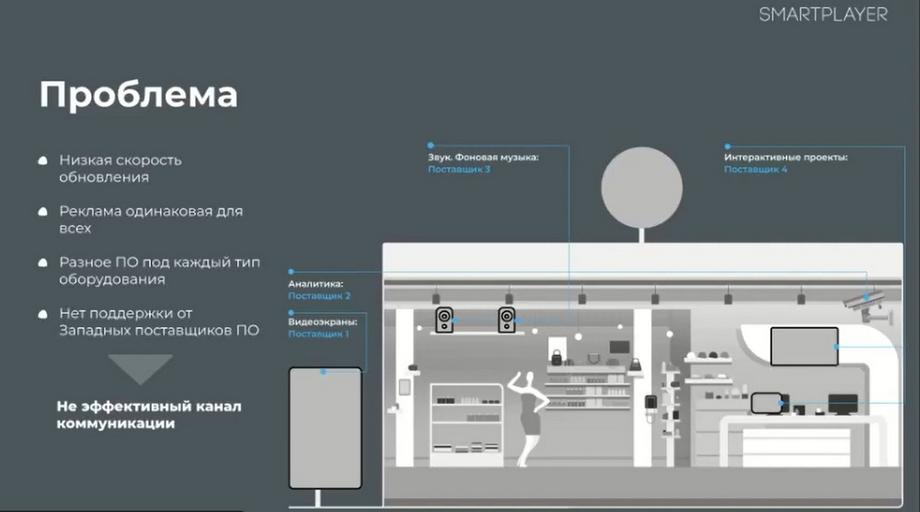
The main problem that customers come to us with is the need for rapid content changes. And often, the customer has a "zoo" of equipment at the site, where they have to use several suppliers. Our platform allows you to combine all this into a single functionality and use only our solution. You can connect background sound, touch panels, and professional panels to our system.
Our solution is supported on 95% of the devices that are currently on the market. New things appear almost every month, mainly from China. We test everything and quickly give our assessment of the project.
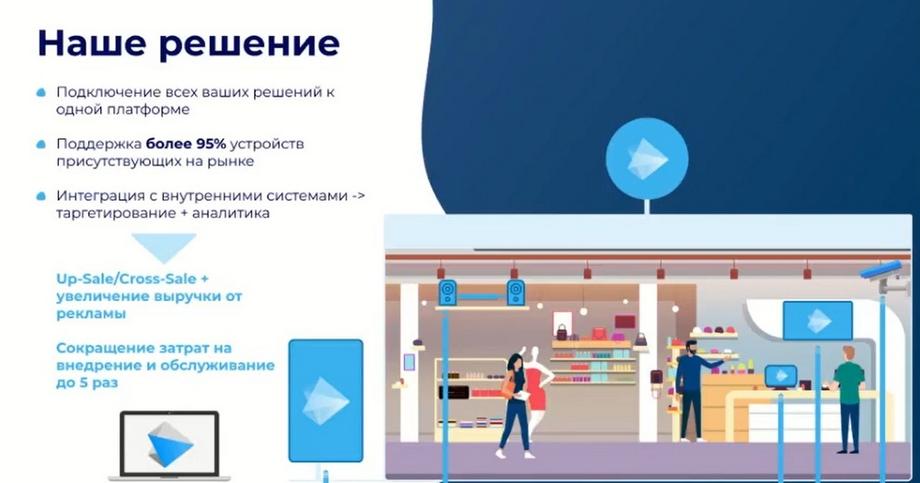
We are a company that specializes not only in "out-of-the-box" solutions for playing content, but we also often integrate with the customer's internal networks. These can be loyalty systems, sensors, external data, etc.
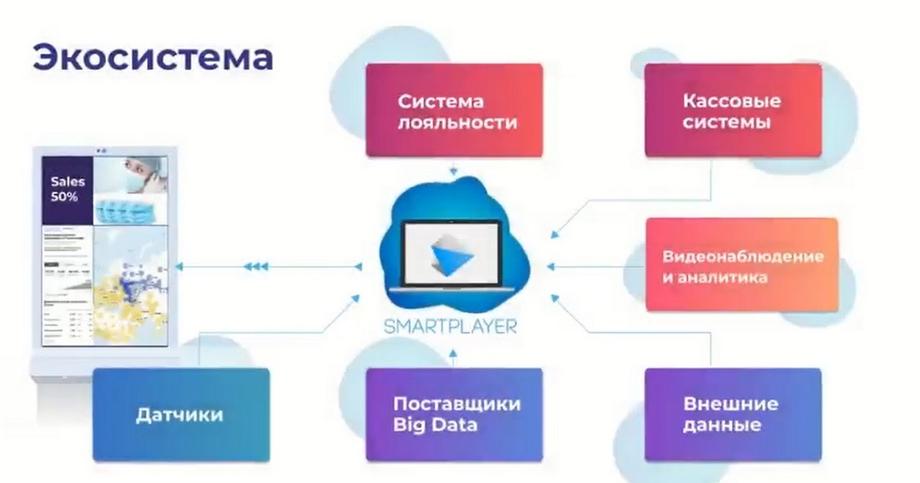
We are able to integrate with all of this. If there is a clear technical specification in the project, we take it for evaluation and give our verdict: whether it is possible or not.
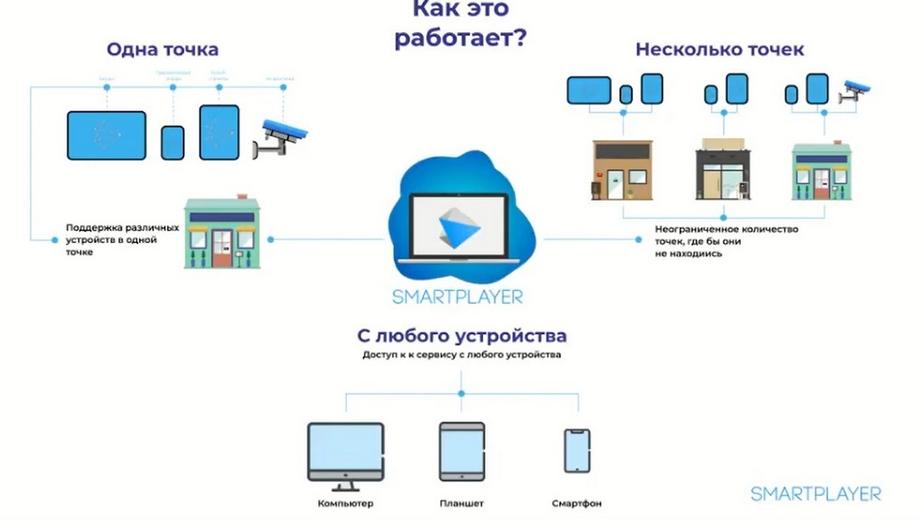
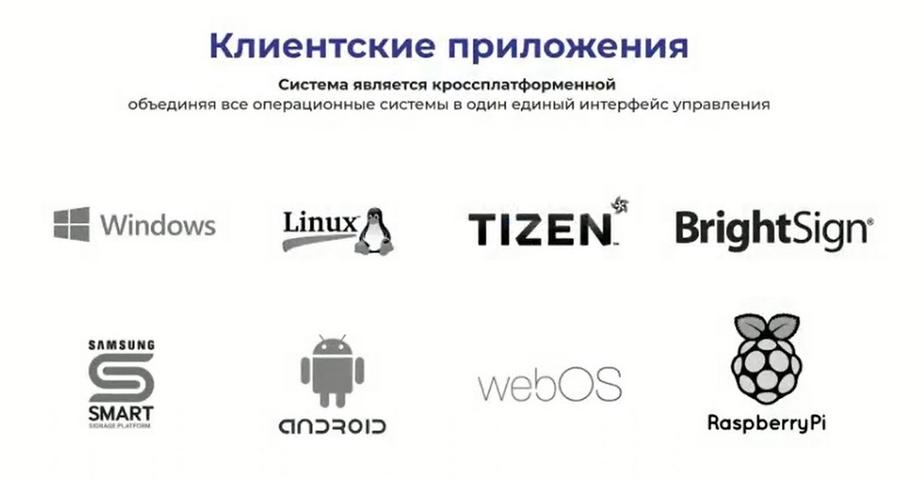
How does our platform work? Using a tablet, mobile device, or computer, the user can go to our resource, link the device, and upload pre-prepared content there. Then a schedule is set, and this content will be broadcast according to the schedule. We work with the following OS: Windows, Linux, professional Samsung panels based on TIZEN, BrightSign, Android, WBS (LG operating system) and RaspberryPi.
The licensing options that are available in the company are as follows. Firstly, it is a cloud solution, also known as a subscription.
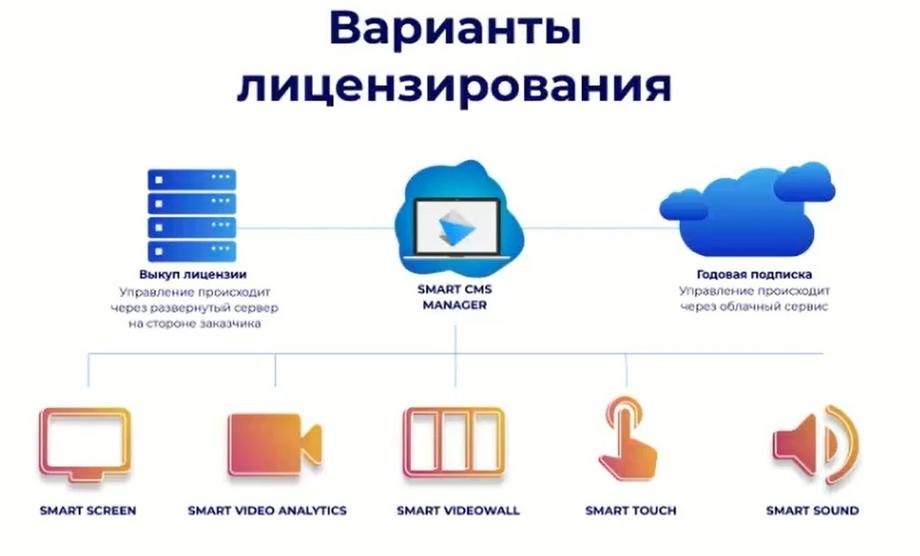
That is, you can subscribe for a year, two, three, etc. With a cloud solution, technical support is included in the license price. Secondly, it is a server solution. We deploy the server on the customer's infrastructure. This solution is usually chosen by government institutions and closed companies that do not want any external access to the cloud and want everything to be deployed on their side.
The server part is purchased. This is a one-time payment. Further, if necessary, you can only pay for annual technical support, which not only provides answers to various requests from the customer, but also updates the server every six months, trains new employees, ships new functionality, etc.
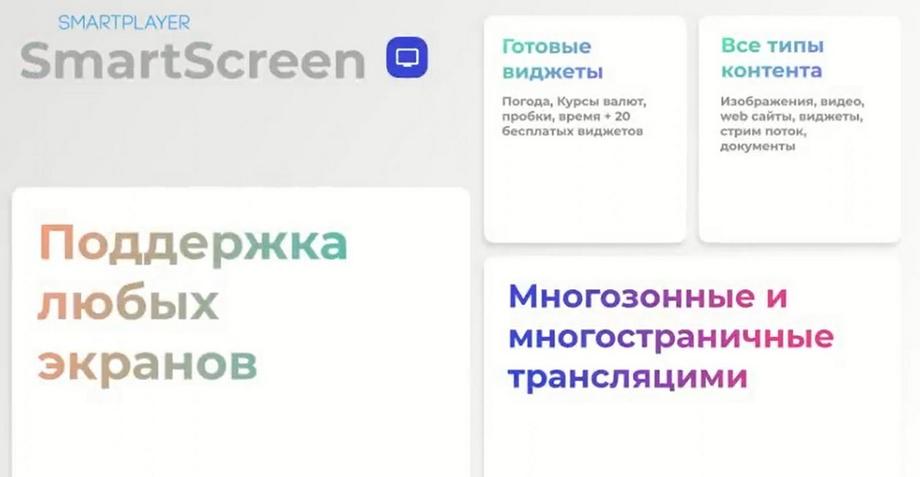
We have different licensing options. Our most popular licenses are SmartScreen. This license is suitable for standalone screens and for playing static and dynamic content. It uses Full HD, HD and 4K resolutions. This license also allows you to play all kinds of widgets, i.e. mini-applications specially created in our system. This can be an exchange rate, a weather widget, traffic jams, navigation, anything.
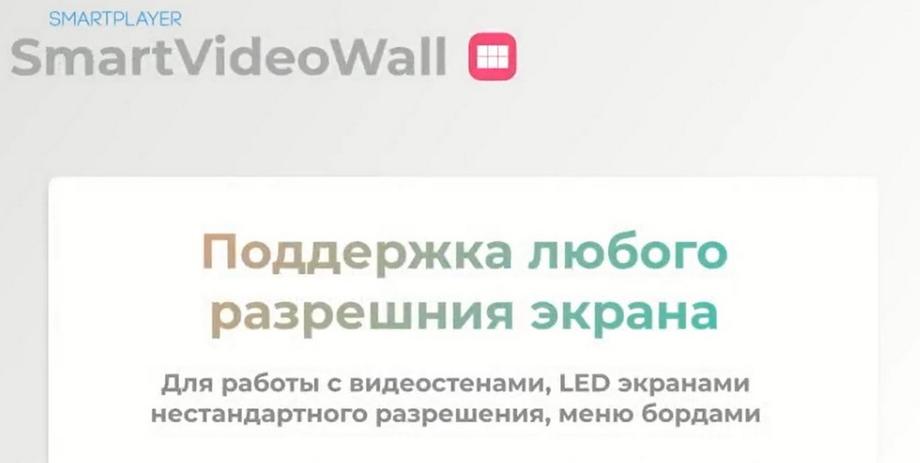
The next license is SmartVideoWall. In essence, it is very similar to the SmartScreen license, but it is designed for screens with non-standard resolutions. As a rule, these are LED screens 3/1, 10/1, 18/17, etc. A separate license was created for such screens.
The SmartTouch license is designed for interactive screens and panels. It is suitable if the customer wants to create some interactive scenarios. All this can be done using our internal editor. A certain area is marked on the screen, and when you click on it, a certain action occurs. This can be a transition to a website, or it can launch a widget or other necessary scenario. All this is configured through our platform.
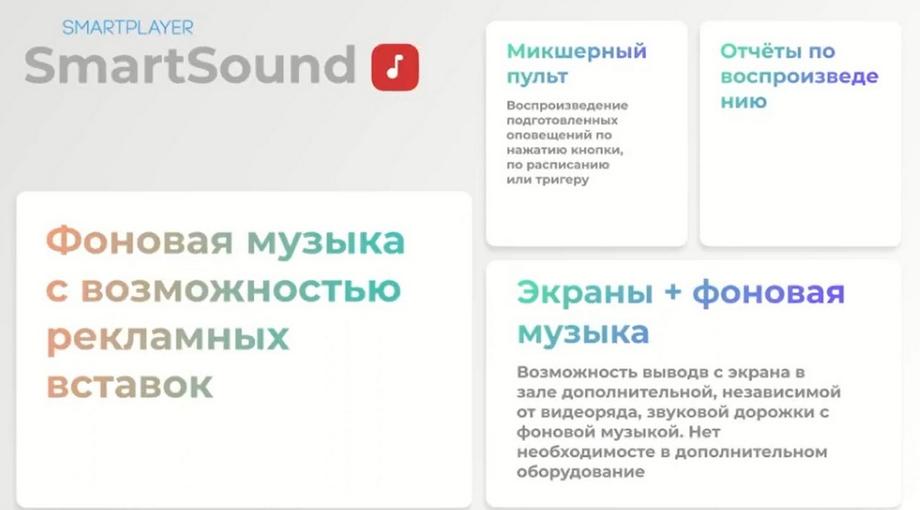
License SmartSound is the simplest license. It allows you to play background sound, but it has its own features. The first is the ability to play commercials. With our internal console, you can assign commercials. This can be done manually so that they appear at a certain time. You can set a certain frequency of their appearance, for example, once every 3, 4, or 5 minutes. You can play with the sound. For example, the main background music plays at a volume of 20, and the commercial plays at a volume of 40. To make the commercial more attractive attention.
Next, let's move on to the technical part and show our functionality. My colleague Timur Ashirov, Head of Presales at Smart Player, will help me here.
He is now logged into the platform. It is a web interface through which all management takes place. Regardless of the type of solution, whether it's a buyout story with a local server, or the use of a cloud solution. In any case, management takes place through a web interface.
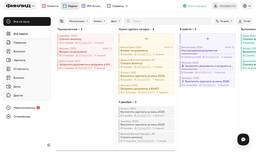
The navigation panel and menu are located on the left. And in the central right part - the working field. I am currently inside our demo account. The maximum functionality is loaded here. In principle, everything that is developed on our platform is in this account. Today we will analyze the main situations that most customers work with.
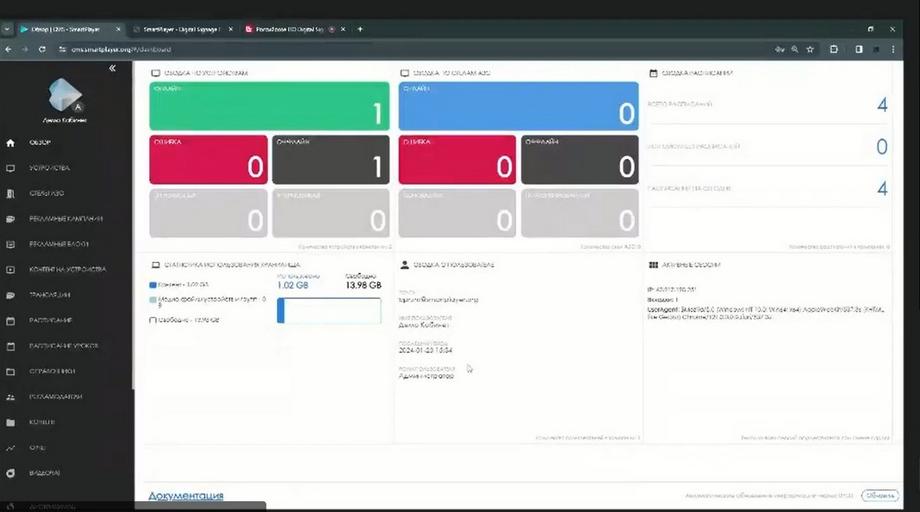
The "Overview" tab. Provides information about what is happening in the system in principle. Now I see in the "Device Summary" section how many devices are on-line, whether there are devices offline and whether there are devices in the car. There are none, which means the device is working correctly.
The schedule summary provides us with information about how many schedules have been created in principle, whether we have devices without schedules. This is all clickable. We can "fall through" deeper. And if we had at least one device without a schedule, the system would display them to us.
Active sessions. Since there can be several people in the system at the same time, whether they are marketers, content managers, or an administrator, all of this will be displayed here. User summary. Information about which account we are currently logged into the system under.
Storage usage statistics. By default, we allocate 15 GB for storing all content. If a local solution is used, the amount of space is already limited only by how much space will be allocated on the server.
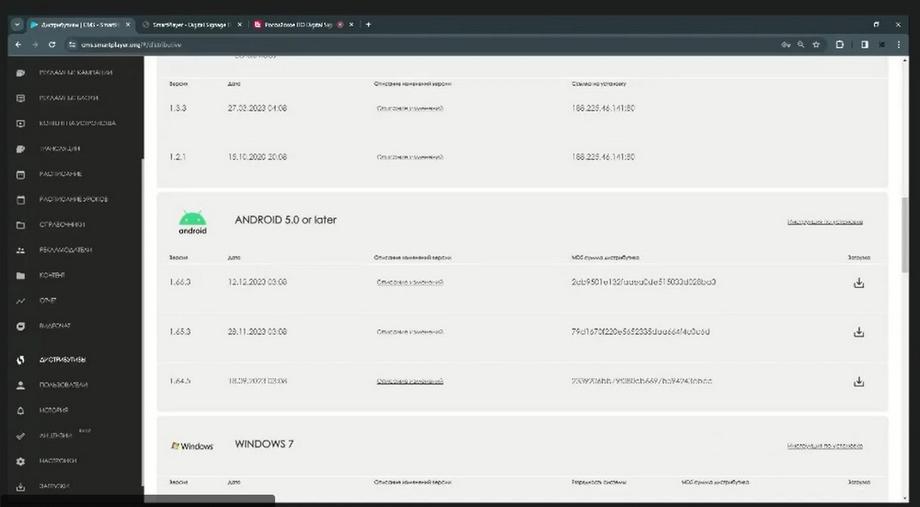
Initially, the work begins with the installation of client applications. You can download them from the "Distributions" section. For the cloud solution, they are available by default, but if a local server is used, they are assembled taking into account the server configuration. Let me repeat: we work with Samsung based on TIZEN, LG - this is directly WBS. Devices running Android. These can be both professional displays based on Android and Android set-top boxes.

We also work with devices on Windows and Linux. I would like to note separately that we work with the Russian "Astra", which is currently very relevant, the RaspberryPi single-board computer and BrightSign professional players. We can select the necessary distribution, download it, and install the device.
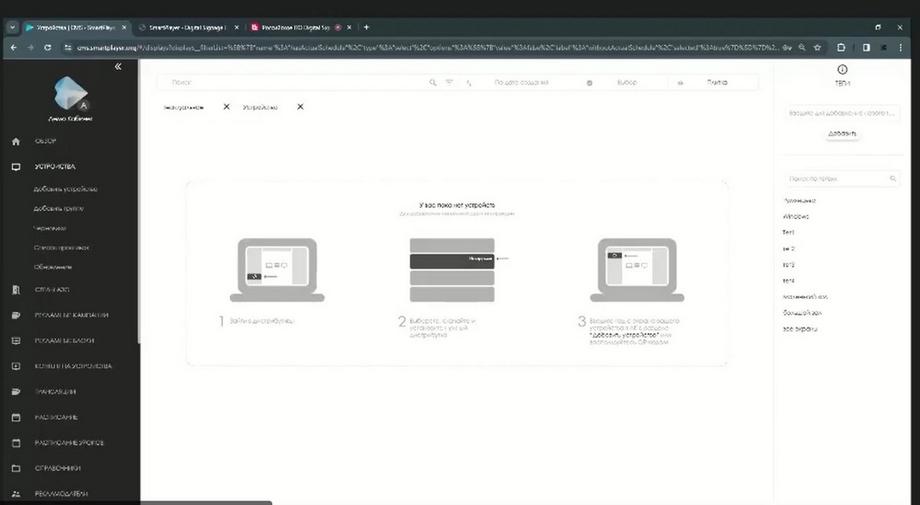
And then in the "Device" section we add it and can interact with it. Currently, I have one device connected. This is my computer. This means that I can interact with it, I can update the Screenshot, find out what is currently being broadcast on the screen, view an enlarged Screenshot, history. That is, we already have status monitoring.

Next is the power management functionality, volume control, and device removal. We can also configure management automation. This is also a very popular feature for saving electricity, as well as for managing the device itself so that it does not play anything idle. We can set timers for rebooting both the client application and the device. We choose how often this action should occur and at what time. Similarly, on/off timers are configured. If an external control computer is used, you can also configure the control of turning the display on/off itself.
When there are a large number of devices in the system, they need to be structured. To do this, we can create a group, give it a name, and thus build a hierarchy similar to how we work at our computers. In addition to the ability to view with tiles, we can use a list. It's more convenient for some people to work this way. Moreover, in the list view mode, the platform administrator will have more information. Here we will already see the IP address, Mac address, last connections, and the date of the last snapshot. This list itself is customizable.
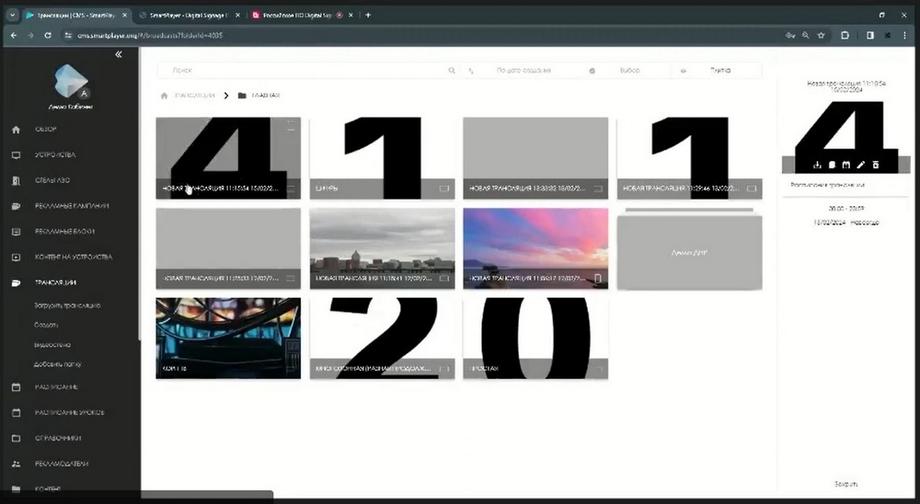
After we have added and configured the device, the next step is to add content. The content itself can also be structured in the same way as we structured the devices earlier. There are already several pre-created folders here, content has been added and structured.
In addition to the fact that we structure the content manually, the system itself also additionally divides it into images, video, audio files, the ability to work with documents, we directly support working with pdf files, with various links, these can be links to both external and internal sources, text documents, tables, and widgets.
After the content has been added, we proceed to create the broadcast itself. The simplest option is the content device functionality. By default, it creates a Full HD horizontal orientation. If the customer uses a vertical orientation, then literally by pressing two buttons, we change the orientation of the display. If your customer has a custom resolution, i.e. an LED screen, then this can also be specified here. Then we simply add the materials we need.
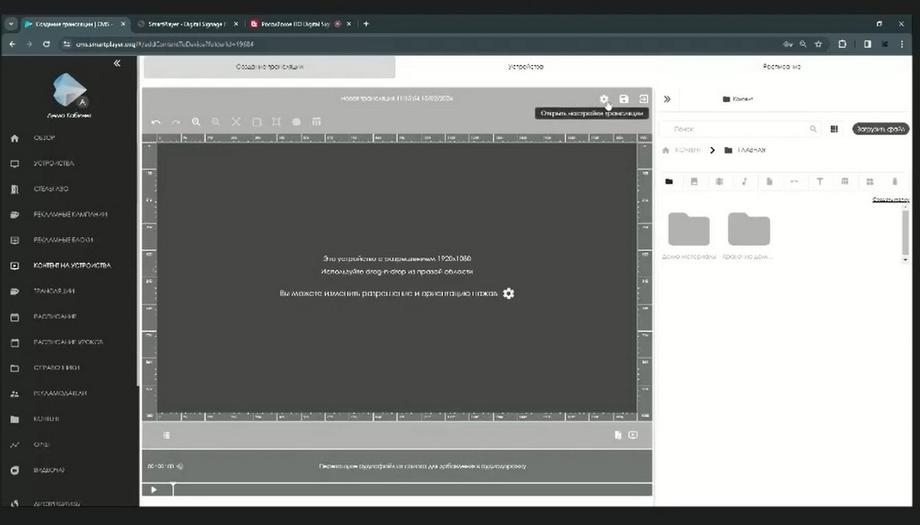
The system works with Drag and Drop. The playlist will be displayed at the bottom. There is the possibility of previewing it. If necessary, we can delete unnecessary files, swap them, or, if required, add another media file.
After we click "save", the system automatically takes us to the next step. This is the device selection stage. We can select both a device individually and a group of devices. All devices that are in a specific folder will be selected, and the created broadcast will be applied to them.

Click "Next" and proceed to the final stage. This is the schedule assignment, i.e. the rule by which all this will be played. By default, the mode is "forever" and "for the whole day". That is, until we physically delete the created schedule, it will be broadcast on our devices. It is possible to select the playback parameter, i.e. once, daily, weekly, when we can choose on which days of the week it will be played. The platform also calculates the number of impressions, duration, and total number of content impressions. The "forever" and "specific days" modes - in the calendar we can choose on which days to display the broadcast.
We can limit the playback of the broadcast not only throughout the day, but also set a specific time period. Suppose from midnight to morning. Something like that. Click "save" and our schedule has been applied to all selected devices, we are taken to the broadcast section. Here we see all the preparations we have created and in particular the one that we have now created with you and applied to our devices.
The second option for interacting with the creation of a broadcast and schedule is the broadcast item. This functionality is more flexible. Here there is already the possibility of finer tuning, in particular, it is not uncommon for customers to need to create some kind of separation. We do this by creating zones. The number of zones is not limited. But integrators should remember that each zone is a separate stream and there is an additional load on the player itself. And we transfer the necessary materials to each zone.
Similarly, you can create other scenarios. If we use a video wall, we can set its parameters. Suppose it is 4K. And, suppose we divide it into 4 screens, fill them with the appropriate content and display them on devices. The basic functionality also includes a reporting system. We can take reports on devices, broadcasts, or content. Advertising campaigns are a separately downloadable functionality. As you can see, the general interface is similar to how we assigned the schedule. We select the period for which we need to generate a report. We can specify the report time, additionally specify the report type, this is content playback, device operation or quality assessment, video analytics, total cost. The last three are projects and require additional integration with the customer's systems.
Next, select the device. You can select one device or a group. Click \"create report\". Here, in the reports section, the generated reports appear, and the system uploads the necessary information.
Several people can manage the system at the same time, so it is necessary to separate their access rights. When we add a new user, we must also specify the role. The platform administrator can use pre-prepared roles or create their own roles. By default, all functionality will be disabled, access is granted separately for each functionality.
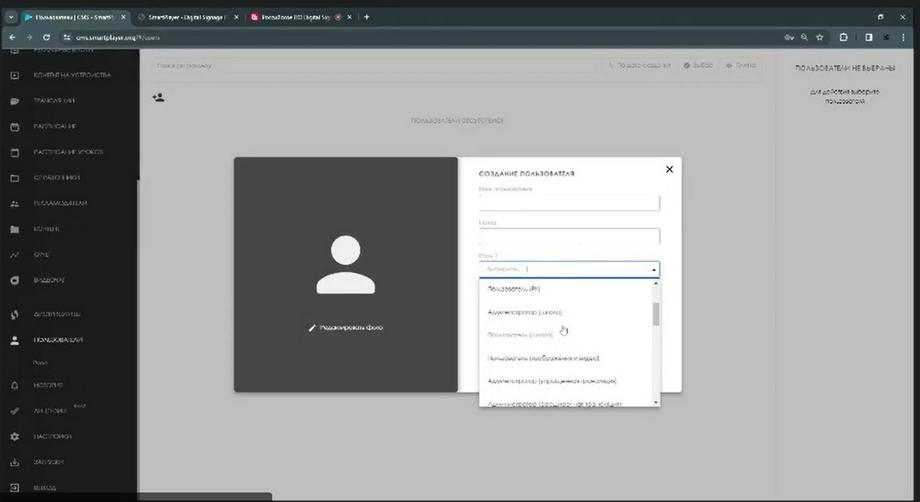
Moreover, access is configured very finely. You can grant access to the entire folder, as well as to each file separately.
Section \"LICENSES\". Here, the administrator will see the number of free licenses, how many licenses he has involved.
\"SETTINGS\". Here, all settings relate directly to the interface itself, highlight a few separately. This is DEFAULT GRAPHIC CONTENT, many customers starting to work with our system may make some kind of mistake, i.e. make it so that no content is displayed on the screen, in order to reduce the negative, you can set a splash screen. The settings have DOCUMENTATION, which leads to our Wikipedia, here is documented work with all platforms.